Last week I posted a very popular article on making compost and the feedback was incredible. I had a few people ask about building a good sturdy compost bin. I originally was going to send them a few images of the compost bin that I currently use, it’s simply three pallets bolted together. Right before I pressed the send button on my email, I kinda realized what I currently have is really not that great. I set out to find a new design that I can build myself and share with everyone.

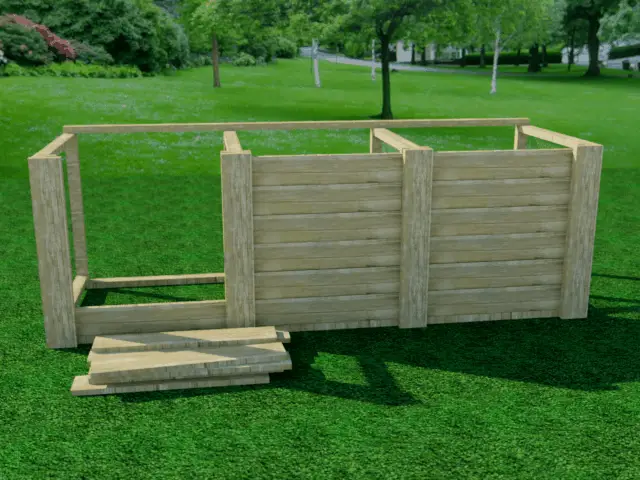
After doing some research, I found some plans online from the University of Missouri. While reading through them, my creative side took over and I came up with a few versions of my own. I also booted up my computer and proceeded to create the design in AutoCAD. The following is what I have created with the existing plans.
Materials
- (4) 12ft pc of pressure treated 2 x 4’s
- (2) 10ft pc of pressure treated 2 x 4’s
- (1) 10-foot length of construction-grade 2 x 4 lumber
- (1) 16-foot length of 2 x 6 lumber
- (6) 8-foot lengths of 1 x 6 lumber
- (1) 22-foot length of 36-inch-wide 1/2-inch hardware cloth
- 16d galvanized nails (2 pounds)
- Poultry wire staples (250)
- (12) 1/2-inch carriage bolts, 4 inches long, with washers and nuts
- One quart wood preservative or stain
Compost Bin Plans
- Cut two 31-1/2-inch and two 36-inch pieces from a 12-foot length of pressure-treated 2 x 4 lumber. Butt-joint and nail the four pieces into a 35-inch x 36-inch “square”. Repeat, building three more frames with the remaining 12-foot lengths of 2 x 4 lumber.
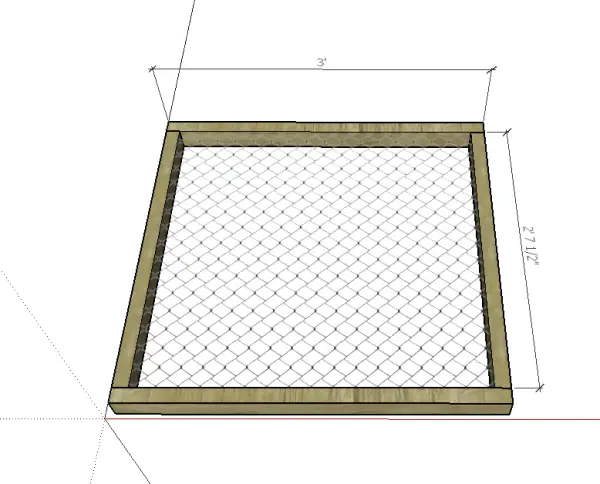
- Cut four 37-inch lengths of hardware cloth. Fold back the edges of the wire 1 inch. Stretch the pieces of hardware cloth across each frame. Make sure the corners of each frame are square and then staple the screen tightly into place every 4 inches around the edge. The wood and wire frames will be dividers in your composter.
- Set two dividers on end, 9 feet apart and parallel to each other. Position the other two dividers so that they are parallel to and evenly spaced between the end dividers. Place the 36-inch edges on the ground. Measure the position of the centers of the two inside dividers along each 9-foot edge.
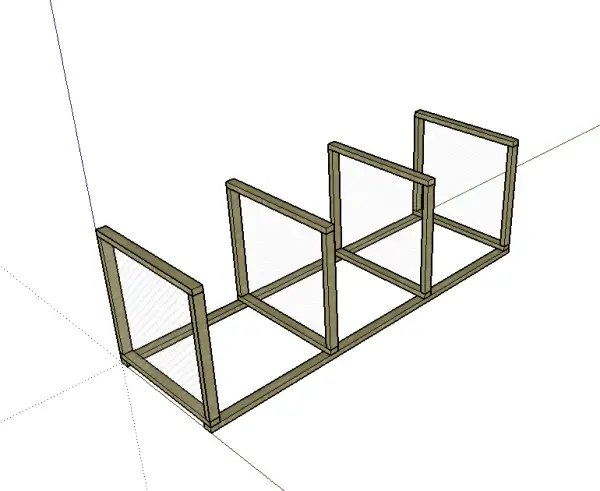
- Cut a 9-foot piece from each 10-foot length of pressure-treated 2 x 4 lumber. Place the two treated boards across the tops of the dividers so that each is flush against the outer edges. Measure and mark on the 9-foot boards the center of each inside divider.
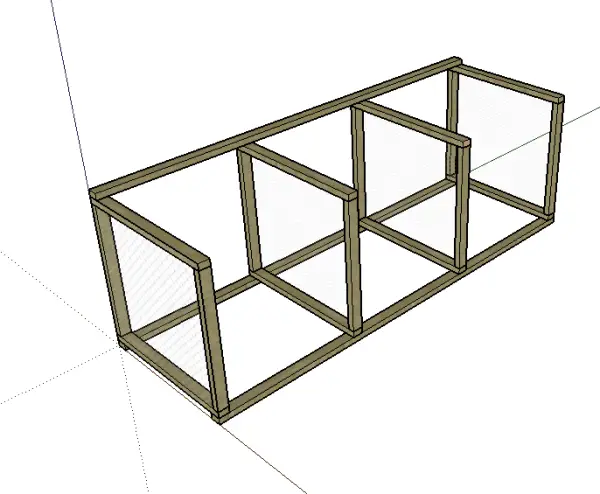
- Line up the marks, and through each junction of board and divider, drill a 1/2-inch hole centered 1 inch from the edge. Secure the boards with carriage bolts, but do not tighten them yet. Turn the unit so that the treated boards are on the bottom.
- Cut one 9-foot piece from the 10-foot length of construction-grade 2 x 4 lumber. Attach the board to the back of the top by repeating the process used to attach the base boards. Using the carpenter’s square, or measuring between opposing corners, make sure the bin is square. Tighten all the bolts securely.
- Fasten a 9-foot length of hardware cloth to the back side of the bin, with staples every 4 inches around the frame.
- Cut four 36-inch-long pieces from the 16-foot length of 2 x 6 lumber for front runners. (Save the remaining 4-foot length.) Rip-cut two of these boards to two 4-3/4-inch-wide strips (save the two remaining strips).
- Nail the 4-3/4-inch-wide strips to the front of the outside dividers and baseboard so that they are flush on the top and the outside edges. Center the two remaining 6-inch-wide boards on the front of the inside dividers flush with the top edge and nail securely.
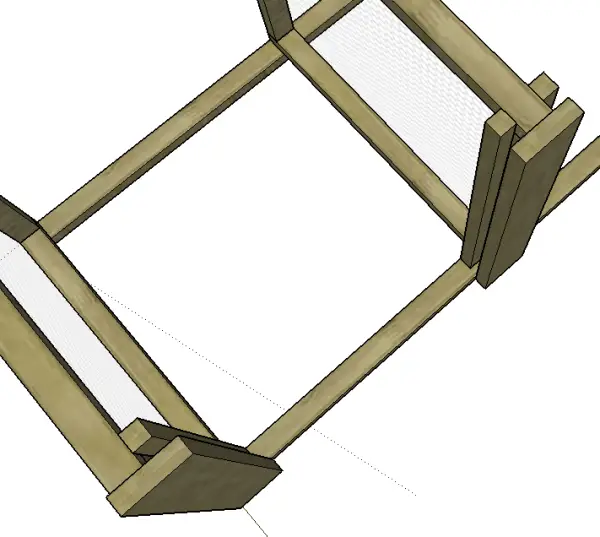
- Cut the remaining 4-foot length of 2 x 6 lumber into a 34-inch-long piece, and then rip-cut this piece into four equal strips. Trim the two strips saved from Step 8 to 34 inches. Nail each 34-inch strip to the insides of the dividers so that they are parallel to, and 1 inch away from, the boards attached to the front. This creates a 1-inch vertical slot on the inside of each divider
- Cut the six 8-foot lengths of 1 x 6 lumber into 18 slats, each 31-1/4 inches long. Insert the horizontal slats, six per bin, between the dividers and into the vertical slots.
- Stain all untreated wood.
Copyright 1993 to 2013 University of Missouri. Published by MU Extension, all rights reserved.

Original article and pictures take http://homesteadandprepper.com/diy-build-a-3-bay-compost-bin/ site
